Creating a Word Cloud with multiple Masks in Python
Let us create a word cloud like this one below with Python.
Introduction
Word clouds are a visually appealing way to represent the frequency or order of words in a given text. Adding a custom shape or mask to your word cloud can enhance its visual impact. In this tutorial, we'll explore how to create a word cloud with a colored image mask using the word_cloud library in Python.
Step 1: Install the Required Libraries
Before getting started, make sure you have the necessary libraries installed. You can install them using the following:
pip install wordcloud
Running this command will install wordcloud and it's dependicies numpy, pillow, and matplotlib.
Step 2: Import Libraries and Load Data
from pathlib import Path
from PIL import Image
import numpy as np
from wordcloud import WordCloud, ImageColorGenerator
Step 3: Prepare the Text Data
text = '\n'.join(['lung', 'air', 'alveoli', 'breathing', 'trachea', 'cartilage'])
Step 4: Load the Image Mask
im = Image.open(Path("lung_trachea_mask.png"))
mask = np.array(im)
image_colors = ImageColorGenerator(mask)
Step 5: Create Word Cloud
wc = WordCloud(
    background_color="white",
    repeat=True,
    mask=mask,
    contour_width=0,
    contour_color='black',
    color_func=image_colors,
    scale=3,
    min_font_size=2,
    max_words=500
)
wc.generate(text)
Step 6: Save the Word Cloud
output_path = Path('Output/')
output_path.mkdir(parents=True, exist_ok=True)
wc.to_file(output_path / 'lung_trachea.png')
This code utilizes an image mask ("lung_trachea_mask.png") to shape the word cloud. The mask used here was obtained from Servier Medical Art, a valuable resource for up-to-date medical images. To tailor the mask for the word cloud, the transparent parts were filled with white. This is the result: 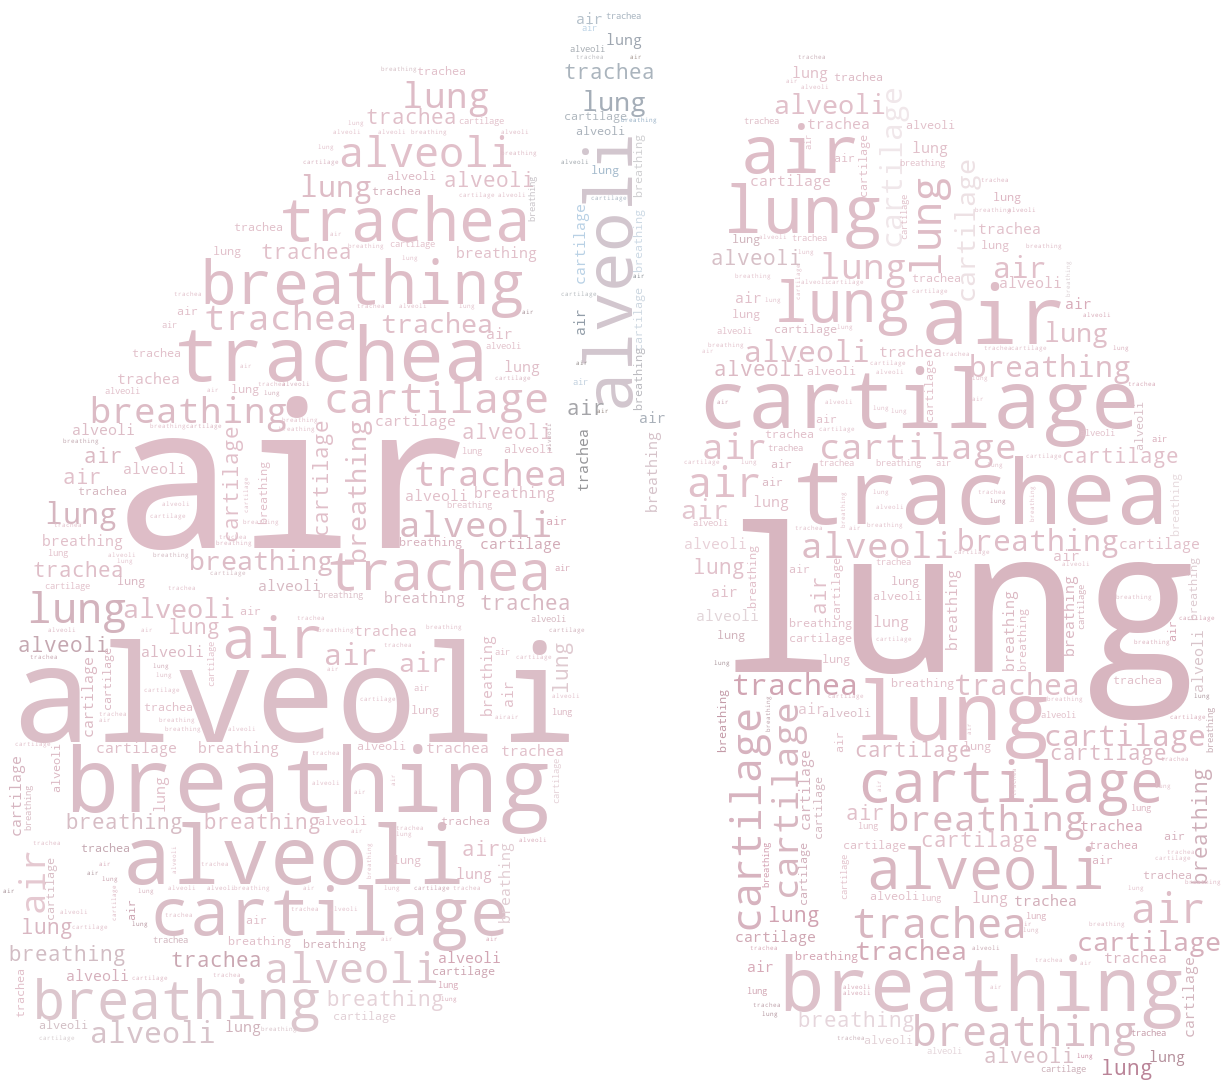
Addressing the Problems
While the code above creates a visually stunning word cloud, it comes with its set of challenges. One notable concern is the potential misplacement of words, as observed in our example. For instance, the word "lung" might appear on the trachea, and words like "trachea" or "cartilage" may appear on the lungs.
Another challenge involves characters that may not display correctly due to font limitations. For instance, when using the symbol "₂" in the word "O₂," the subscript "2" may not render properly if the chosen font lacks support for this character.
Enhancing the Word Cloud
Now let us explore some strategies to overcome these problems.
Overcoming Font Limitations: Choosing the Right Typeface
Font limitations can impact the visual appeal of word clouds, especially when using special characters like "₂." To address this, we recommend selecting a font that supports the full range of characters in your text. In the updated code, we used Google Fonts to find a suitable typeface.
# Specify the path to the font file (replace 'Play-Regular.ttf' with the actual font file)
font_path = 'Play-Regular.ttf'
Resolving Overlaps: Customized Masks for Specific Keywords
To mitigate the issue of words overlapping in our word cloud, we can take a targeted approach. Instead of using a single mask for all keywords, we'll create two distinct masks: one focusing on the lungs and another on the trachea. By doing so, we can control the placement of words related to each anatomical feature. For this task we can use tools like remove.bg to erase certain areas of our original image.
Now we can create two distinct Wordclouds like this:
# Text for the 'lung' mask
lung_text = '\n'.join(['lung', 'air', 'alveoli', 'breathing', 'N₂', 'O₂', 'CO₂'])

# Text for the 'trachea' mask
trachea_text = '\n'.join(['trachea', 'larynx', 'cartilage'])

# Load the 'lung' mask
im = Image.open(Path("only_lung_mask.png"))
mask = np.array(im)
image_colors = ImageColorGenerator(mask)

# Create WordCloud for 'lung' mask
lung_wc = WordCloud(
    mode="RGBA",
    background_color=None,
    repeat=True,
    mask=mask,
    contour_width=0,
    contour_color='black',
    color_func=image_colors,
    scale=3,
    min_font_size=2,
    max_words=500,
    font_path=font_path
)
lung_wc.generate(lung_text)

# Load the 'trachea' mask
im = Image.open(Path("only_trachea_mask.png"))
mask = np.array(im)
image_colors = ImageColorGenerator(mask)

# Create WordCloud for 'trachea' mask
trachea_wc = WordCloud(
    mode="RGBA",
    background_color=None,
    repeat=True,
    mask=mask,
    contour_width=0,
    contour_color='black',
    color_func=image_colors,
    scale=3,
    min_font_size=2,
    max_words=300,
    font_path=font_path
)
trachea_wc.generate(trachea_text)
Combining Word Clouds for a Comprehensive Visualization
The final step involves merging the word clouds created with the specific masks and exporting the result to an PNG File.
# Combine the generated Wordclouds
lung_wc.layout_.extend(trachea_wc.layout_)

# Set up the output path
output_path = Path('Output/')
output_path.mkdir(parents=True, exist_ok=True)

# Save the combined WordCloud as PNG
lung_wc.to_file(output_path / 'lung_trachea.png')
Bonus: Exporting as SVG
As a bonus feature, we can export the word cloud as an SVG file using the snippet below. This format retains vector graphics, providing scalability and flexibility for use in various applications.
# Bonus: Export as SVG
with open(output_path / 'lung_trachea.svg', 'w') as f:
    f.write(lung_wc.to_svg(embed_font=True))
It's essential to note a crucial consideration when working with SVG. By default, SVG may apply font kerning, which adjusts the spacing between characters for better visual appeal. However, to maintain consistency with the PNG output, it's recommended to disable font kerning in the SVG.
Results and final code:
Here is the final result: 
and the final code:
from pathlib import Path
from PIL import Image
import numpy as np
from wordcloud import WordCloud, ImageColorGenerator

# Specify the path to the font file (replace 'Play-Regular.ttf' with the actual font file)
font_path = 'Play-Regular.ttf'

# Text for the 'lung' mask
lung_text = '\n'.join(['lung', 'air', 'alveoli', 'breathing', 'N₂', 'O₂', 'CO₂'])

# Text for the 'trachea' mask
trachea_text = '\n'.join(['trachea', 'larynx', 'cartilage'])

# Load the 'lung' mask
im = Image.open(Path("only_lung_mask.png"))
mask = np.array(im)
image_colors = ImageColorGenerator(mask)

# Create WordCloud for 'lung' mask
lung_wc = WordCloud(
    mode="RGBA",
    background_color=None,
    repeat=True,
    mask=mask,
    contour_width=0,
    contour_color='black',
    color_func=image_colors,
    scale=3,
    min_font_size=2,
    max_words=500,
    font_path=font_path
)
lung_wc.generate(lung_text)

# Load the 'trachea' mask
im = Image.open(Path("only_trachea_mask.png"))
mask = np.array(im)
image_colors = ImageColorGenerator(mask)

# Create WordCloud for 'trachea' mask
trachea_wc = WordCloud(
    mode="RGBA",
    background_color=None,
    repeat=True,
    mask=mask,
    contour_width=0,
    contour_color='black',
    color_func=image_colors,
    scale=3,
    min_font_size=2,
    max_words=300,
    font_path=font_path
)
trachea_wc.generate(trachea_text)

# Combine the generated Wordclouds
lung_wc.layout_.extend(trachea_wc.layout_)

# Set up the output path
output_path = Path('Output/')
output_path.mkdir(parents=True, exist_ok=True)

# Save the combined WordCloud as PNG
lung_wc.to_file(output_path / 'lung_trachea.png')

# Bonus: Export as SVG
with open(output_path / 'lung_trachea.svg', 'w') as f:
    f.write(lung_wc.to_svg(embed_font=True))
Now you're ready to visualize your text data in a creative and engaging way!